Working with Github
Most projects done SSF2 teams will be done on GitHub so having a basic understanding of git or any version control is important.
This tutorial will guide you through the process of creating a simple repository on Github, as well as teach you the basics of making pull and push requests.
Additionally, we will cover some fundamental terminology to help you better understand Git and Github.
Note
If you already have experience with Github you can skip this part of the tutorial.
What’s Needed
A GitHub AccountGitHub Desktop
What is Git/Github
GitHub- is a web-based hosting service for Git repositories.Git- is a distributed version control system for software development. It provides developers with the ability to manage changes to their code, collaborate with other team members.
Using Git on the command line may be challenging for those who are unfamiliar with it. Therefore, for this tutorial, we will use GitHub Desktop as a graphical user interface for managing Git repositories.
Git/GitHub terminology
Before we start the tutorial we are going to learn some basic terminology
Repository (Repo)- A repository is a location where Git stores all the files. People usually refer to the project as this.Commit- A commit is a record of changes to the repository at a specific point in time.Branch- A branch is a parallel version of the code in a repository. It allows developers to work on different features or versions of the code simultaneously without affecting the main code.Merge- Merging is the process of combining changes made in different branches of a repository into a single branch.Clone- Cloning is the process of creating a local copy of a remote repository on your computer.Pull- Pulling is the process of downloading changes from a remote repository (GitHub in this case) to a local repository.Push- Pushing is the process of uploading changes made in a local repository to a remote repository.
Note
There are a lot more Terms like Fork, Remote, Pull Request but for now well stick to the baisc. If you want to learn more about this you can read about it HERE
Cloning the Repository
Cloning a repository in Git means making a copy of the remote repository on your local machine. This allows you to work on the code locally and make changes without affecting the codebase in the remote repository until you are ready to push your changes.
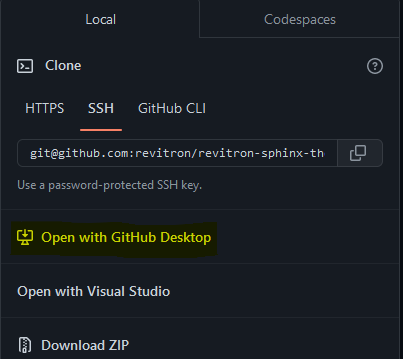
To clone a repository click on the green <> Code button on the top right of the page. Once the tab is open click on Open with GitHub Desktop.
Warning
PLEASE DO NOT USE DOWNLOAD ZIP This will slow down the process drastically.
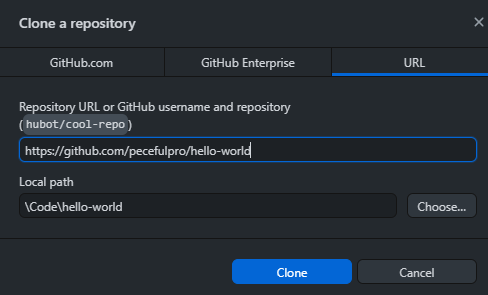
Once you hit the open in GitHub dekstop tab you might be warned about opening in GitHub desktop and hit ok Your Github Desktop should pop open with this picture below. If it does you did everything good if not you might not be signed in.
Do not change the Repository URL but you can change the Local Path if it’s not to your liking. Once everything looks good you can hit the clone button.
Once GitHub Desktop Is Finished Download the Repository Congratulations you have successfully cloned a repository.
You can hit the Show in files button in the image below to see your newly downloaded files.
Warning
If you just want to use the IDK then you can stop here.
Creating a Github Repository
Creating a Repository easy on Github
1. Click the drop down of your profile and hit Repository, After that hit the new button or you can use this LINK
It will ask for a repository name, You can put anything here.
Click the check mark for
Add a README fileThere will be other options but for this tutorial they are not important so you can skip it if you would like.
Once you finish creating the Repo clone the file to your computer.
Learning the Github Layout
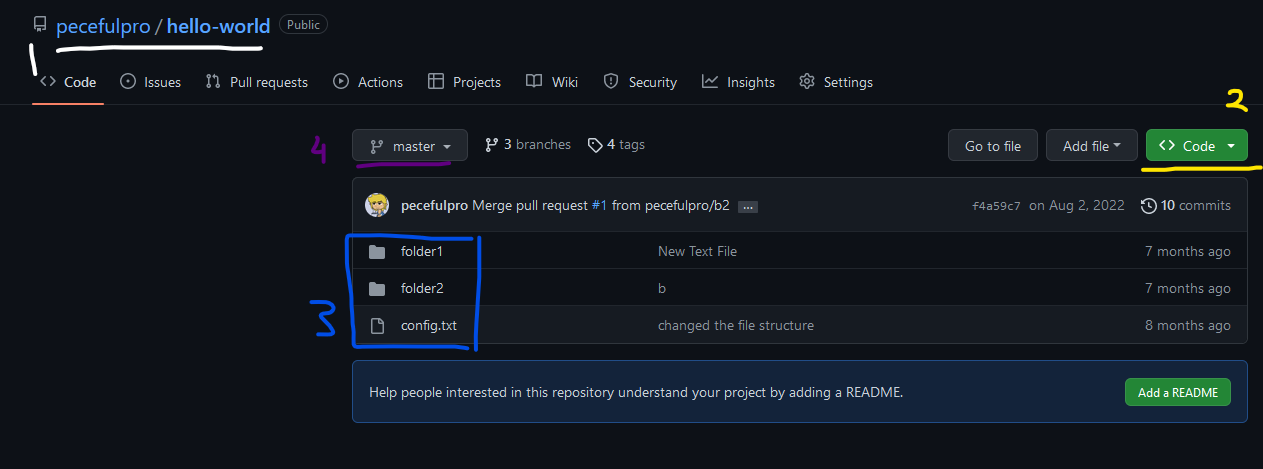
I’ll be using my Repository as an example for this tutorial but your repository should look the same as the picture below with less files.

For now we’ll focus on 4 main buttons
This is the project name and the person who made the Repository
This is where you would go if you were to download or clone the project. We will get back to this later
This is the source code or project files that the project uses
This is the current branch master. The master branch represents the stable/current version of the code. You can have many other branches at once.
Pushing Changes
Pushing changes - in Git means sending the committed changes from your local repository to the remote repository. This allows other developers to access the changes you have made and collaborate on the project.
So we are going to start with pushing a baisc change
navigate to your repository folder that you cloned
create a txt file with any name and write some text into it
Save the text file and open Github Desktop you should see the new file plus the change you made in the text file.

If you see this then you did everything correct.
Now we are going to push this change to the repository on GitHub. In the bottom left of the screen you should see a discription box.
The first box is the commit message - this should be a new words on what you did
The discription box should be a longer explanation of what you did but filling thix box isnt nessary.
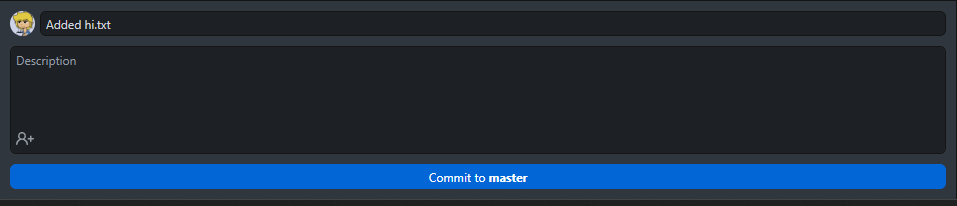
5. Once you finished Hit the Commit to master button your changes go to the staging area and it’s not fully pushed to GitHub. To do this we need
to go to the top right of the app
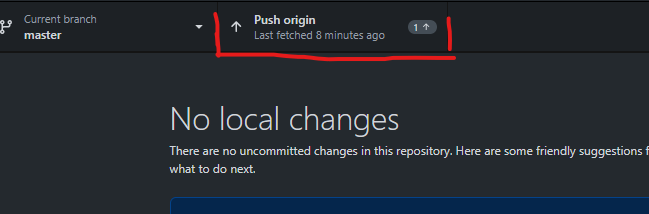
You should see an arrow pointing up with a number representing the number of commits you have made. Click on the button and the app will upload your changes to GitHub.|
Once the app is done uploading head over to your GitHub Repository on the website and you should see the change you made.
Pulling Changes
Pulling Changes is way easier than pushing them. If you or any teammate working on your project pushes a change you can receive them on your local repository.
To check press the Fetch orgin button. This is the same button we used to push the change
If there is a change there will be a down arrow icon like shown below
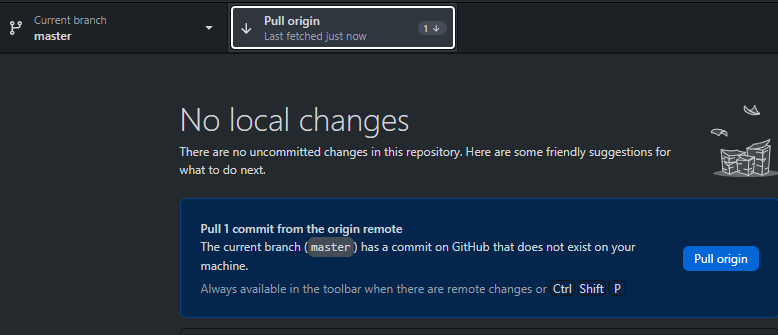
Click the button again and it will upload all the changes to your repository and if you wanted to see the changes you can click on the history tab.
Note
If there is a file that conflicts with one that you are currently working on GitHub will give you an option to merge or skip the change.
Next Steps
Great Job you should have a basic understanding of the tools and knowedge you need to start modding the game.
Adobe Animate WorkSpace - This guide provides a summary of how to utilize Animate software for SSF2.